It’s Strawberry Season! A Strawberry Shortcake Style Yogurt Parfait

Leave a comment

It’s strawberry season!  Aside from strawberry ice cream, I loooove strawberry desserts and I’m really excited about the prospect of possibly going strawberry picking this summer.  I just need to find the right farm that’s not too far away, bring a floppy hat, and wear some comfortable pants and shoes and I’ll be good to go!  I’ve never been strawberry picking before and I want to so much.  The thought of bringing home a mini truckload of strawberries makes me giddy because it’s one of the few “pickable” fruits that I’m not allergic to!  I went cherry picking once when I was little down in Niagara, before my cherry allergy developed, and I remember having such a fun time, holding my little basket and filling it to the brim with plump cherries. 

We’ll see if the strawberry picking trip pans out, but in the meantime, I’m celebrating the strawberry love with a strawberry shortcake style yogurt parfait!  What we have here: vanilla yogurt, sliced strawberries, crunchy honey granola, and white chocolate chips.  I completely forgot about the graham cracker crumbles for this concoction, but it was yummy nevertheless because strawberries and white chocolate are meant to be and any excuse to use white chocolate is a good one.  

I’m going to keep my eye out for any and all strawberry fests in town over the next little while and although this is wishful thinking, I really hope Il Fornello will bring back their special strawberry themed menu from two years ago.  I never got the chance to try anything off of it and would love to go crazy and indulge in a 3-course meal chock full of stawberries!  There were so amazing strawberry dishes on that menu, both sweet and savoury, and you can bet I’d be posting up a storm here if I got the opportunity to take advantage of it the second time around.  So, with baked goods and savoury eats in mind, here’s to many delicious strawberry goodies over the course of the summer! 

The Oreo Anniversary Series – Crushing Oreos to Bake Inside Out Oreo Stuffed Chocolate Chip Cookies!

5 Comments

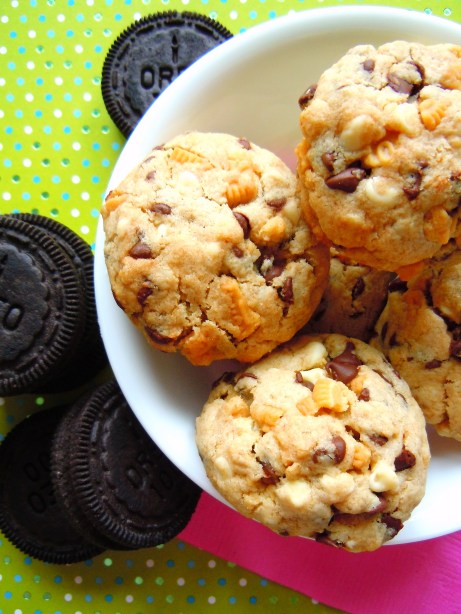
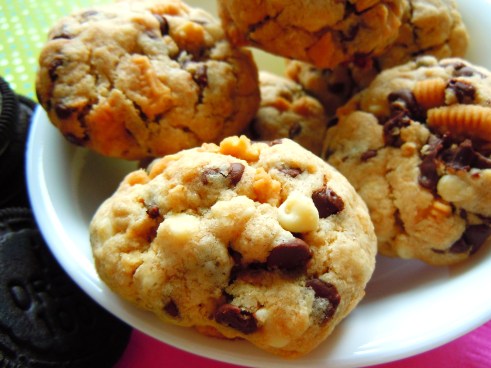
Happy Passover and Easter, everyone!  I hope everyone has a little room left in their bellies for my cookie treat because I KNOW you guys will absolutely love and foam at the mouth over this one!  First off, how do you all like to eat your Oreo cookies?  Twisting them?  Dunking them in milk?  Shoving them in your mouth and closing your eyes as you float through cookie heaven?  Or do you prefer to have a dessert within a dessert, with your Oreos in a cupcake or cheesecake or cake?  How about a cookie…within a cookie?!  Introducing my beloved inside out Oreo stuffed chocolate chip cookies!!  *Cue harps and angels singing* 

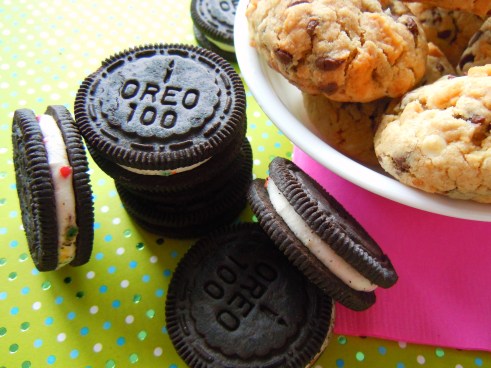
With all the crazy Oreo birthday madness going around and my constant cookie recipe brainstorming, I thought to myself, “how awesome would it be to have an Oreo stuffed cookie full of crushed Oreos!”  And so the crushed Oreo chocolate chip studded cookie was born.  I used crushed golden Oreos since that’s what I had on hand in my pantry, but think of all the delicious possibilities!  You could crush chocolate fudge ones, chocolate mint ones, and – wait for this – the brand spankin’ new birthday cake Oreos!  I tested this out with the cookie recipe base that I had been using for the last several recipes I posted on Ate by Ate (just substituting and switching around “add-on” ingredients” each time”) and I loved them!  My mum lifts the lid of our cookie box every day just to get a whiff of them and my dad said that after eating one, he wants a gazillion more because they’re delicious! 

Two facets of the food industry I really enjoy having fun with are the collectibles and hunting down fun flavours of things.  I am crazy about collectibles and special edition things, even though being Canadian sometimes has me stymied when it comes to special flavours that aren’t available on my side of the pond.  Lip glosses, Hello Kitty items, and food-related memorabilia rank at the top of my list of fun things to collect and I have cargo ship sized collections of all three to prove it!  My favourite sweets and snacks to chase down are M&M tins and collectibles, M&M flavours, flavoured Kit Kats (not regular ones, just flavoured ones), and of course, Oreo cookies! 

Which leads me to another one of my more recent happy moments: getting my hands on Oreo’s 100th birthday cake cookies!  Do you know what I did when my mum brought home a beautiful, shiny new bag of special 100th birthday and anniversary Oreos from the supermarket?  I grabbed it and I hugged it.  The same way Winnie the Pooh hugs his pot of honey.   

Recipe for Inside Out Oreo Stuffed Chocolate Chip Cookies (yields 4-5 dozen small cookies)

Ingredients

  • 2 cups all-purpose flour
  • 1 cup quick-cooking or old-fashioned rolled oats
  • 1 teaspoon baking powder
  • 1 teaspoon baking soda
  • 1 teaspoon kosher salt
  • 2½ sticks unsalted butter (10 ounces), at room temperature (make sure the butter is super soft and squishy!)
  • 1 cup brown sugar
  • 1/2 cup granulated sugar
  • 1 large egg, at room temperature
  • 1 large egg yolk, at room temperature
  • 1 tablespoon pure vanilla extract
  • 20 crushed Oreo cookies (I just crushed them with my hands but you could also crush them with a mallet) 
  • 1 ½ cups of semisweet chocolate chips
  • 1 ½ cups of white chocolate chips

Directions

  • Preheat the oven to 325°F.  Line 2 baking sheets with parchment paper (*Deb’s Note: Depending on how big you make your cookie dough balls, you’ll need to reuse your cookie sheets a few times.  My oven runs hot, so I actually don’t bother putting anything on the bottom rack and only use the top rack, placing 2 baking sheets vertically side by side).
  • In a medium bowl, mix the flour with the oats, baking powder, baking soda, and salt (*Deb’s Note: I didn’t use the mixer for this step, I just used a large spoon to mix everything together).
  • Beat the butter and both sugars at medium speed until creamy.  Add the egg followed by egg yolk and vanilla, beating well between additions and scraping down the side of the bowl as necessary (*Deb’s Note: I don’t have a standing mixer so I used a handheld).
  • Beat in the dry ingredients, then add the crushed Oreo cookies, followed by the semisweet chocolate chips and white chocolate chips.  Using a large spoon or your clean hands, fold in until evenly distributed. 
  • Grab fistfuls of cookie dough and shape into golf ball sized balls.  Place cookie dough balls onto the baking sheets, 2 inches apart.  Flatten them slightly with either the bottom of a spatula or the palm of your hand.  Bake 11-13 minutes, until the cookies begin to brown at the edges.  Let the cookies cool on the baking sheets, then transfer them to a rack to cool completely (*Deb’s Note: I placed 15 dough balls on each baking sheet and took them out after 11 minutes for super soft cookies.  If you prefer crispier cookies, leave them in for 12 or 13 minutes).

*****

Recipe inspired by Food & Wine magazine.  Sampson, Sally.  “How Baking Can Change the World.” Food & Wine November 2011: 130.

Christmas Cookie Baking Fun! Crackled Chocolate Candy Cane Cookies

6 Comments

I know it’s a little overdue, but my holiday baking and Christmas cookies are finally here!  I’ve been looking forward to posting Christmas cookies and recipes for so long and I’m so excited to finally have homemade holiday baked goods to share with you all.  There were so many recipes I wanted to try, I was bookmarking and dog-earing pages like crazy, and I was also enjoying everyone else’s Christmas cookie fun via the interwebs on my friend Katrina’s blog, In Katrina’s Kitchen, where she hosted an “I’ll Bring the Cookies” cookie party all month long!  In an ideal world, I would love to bake 5 kinds of cookies and cookie desserts EVERY DAY and you’d all be able to come to my house for a cookie party!  Realistically though, I just share them with my family, boyfriend, grandparents, hair stylist, and whichever friends I happen to see during the times I bake cookies.

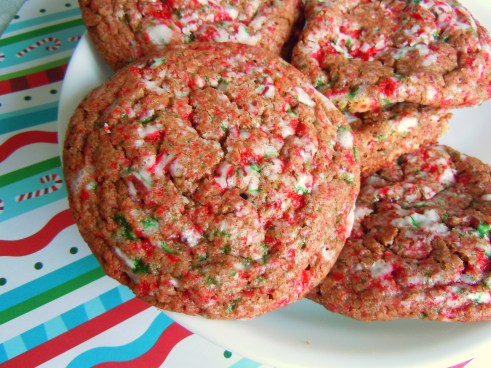
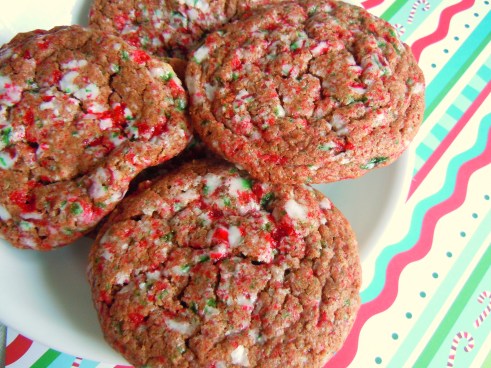
I had so much fun making and baking these Chocolate Candy Cane Cookies (how’s that for some fancy alliteration?) because I actually got to improvise and experiment a little!  See, I didn’t actually use an entire printed recipe from a magazine or book to make these.  After realizing what an amazing, holy grail cookie batter base I had going on here, I used the basic framework of the cookie recipe, modified it just a little bit, and made the rest up on my own.  And it worked!  Sort of.  The recipe and ingredients worked out beautifully, but I was a little overzealous and put a few too many cookie dough balls on the first cookie sheet and they ended up overcrowding one another, but I learned my lesson and the rest turned out PERFECT!

I wanted to make something fun and special for my friend Lindsay for Christmas since she loves mint chocolate so much, so I figured, why not experiment with a chocolate peppermint candy cane cookie?  I wasn’t sure if I, personally, would enjoy them since I’m still warming up to peppermint things and mint chocolate, but I have to tell you, I love these cookies so much, and even my mum, who isn’t a fan of peppermint or mint chocolate, loved them too!  Not to mention I loved the way they turned out appearance-wise with the crackling and the candy cane mosaic.  Let’s share and spread the Christmas cookie love!

Recipe for Chocolate Candy Cane Cookies (yields 4 dozen medium-sized cookies or 3 dozen large cookies)

Ingredients

  • 2 cups all-purpose flour
  • 1 cup quick-cooking or old-fashioned rolled oats
  • 1 teaspoon baking powder
  • 1 teaspoon baking soda
  • 1 teaspoon salt
  • 2½ sticks unsalted butter (10 ounces), at room temperature
  • 1/2 cup brown sugar
  • 1 cup granulated sugar
  • 1 large egg, at room temperature
  • 1 large egg yolk, at room temperature
  • 1 tablespoon pure vanilla extract
  • 2 oz. semisweet chocolate chips, melted and slightly cooled
  • 1½ cups white chocolate chips
  • 1 cup crushed candy canes

Directions

  • Preheat the oven to 325°F.  Line 2 baking sheets with parchment paper.  (*Deb’s Note: Depending on how big you make your cookie dough balls, you’ll need to line your cookie sheets a few times to bake the 3 or 4 dozen.  My oven runs hot, so I actually don’t bother putting anything on the bottom rack and only use the top rack, placing 2 baking sheets vertically side by side).
  • In a medium bowl, mix the flour with the oats, baking powder, baking soda and salt.  (*Deb’s Note: I didn’t use the mixer for this step, I just used a large spoon to mix everything together).
  • Beat the butter and both sugars at medium speed until creamy.  Add the egg followed by egg yolk and vanilla, beating well between additions and scraping down the side of the bowl as necessary.
  • Melt the semisweet chocolate chips and add to wet mixture, mixing until thoroughly incorporated (*Deb’s Note: I know some people prefer to use the steam method, melting the chocolate over a pot of boiling water, but I actually do it in the microwave.  I blast it at 20 second intervals, stirring after each interval until the chocolate is smooth.  You don’t have to do this, but I added a small splash of milk to my melted chocolate).
  • Slowly beat in the dry ingredient mixture, then fold the white chocolate chips into the batter.
  • Using clean hands, roll mounds of cookie dough into balls about 1 inch in diameter.  Roll the cookie dough balls in the crushed candy canes, coating the entire ball.  Place coated cookie dough balls onto the baking sheets, 12 balls to a sheet (*Deb’s Note: Here is where I was a little overzealous with the first batch.  Instead of 12, I placed 15 and the cookies were overcrowded.  Make sure you don’t make the balls bigger than an inch in diameter because the dough spreads.  If you want the cookies larger, I’d say only put 8 cookie balls to a sheet). 
  • Bake 12-15 minutes, until crackling forms.  Let the cookies cool on the baking sheets, then transfer them to a rack to cool completely (*Deb’s Note: Mine took 14 minutes in the oven).

Here’s a cute gift idea: to mimic the texture and “crackled” appearance of the crushed candy canes, take the cookies and break them into smaller pieces to create cookie bark!  Place in some clear cellophane and tie the bundle up with some pretty ribbon.  Ta-da!

*****

Recipe inspired by Food & Wine magazine.  Sampson, Sally.  “How Baking Can Change the World.” Food & Wine November 2011: 130.

Indulging My Inner Bake Sale Fanatic! Soft, Chewy Cranberry Cookies With White & Semisweet Chocolate Chips

5 Comments

It feels like forever since I last baked cookies!  I know it’s only been about two and a half months, but I have a constant baking itch that makes it seem like eons between batches.  I go through phases where I’ll bake cookies five times in a row, jump over to muffins, daydream about cake pop flavours and cupcake frosting, and then come back to my beloved cookies.  October was filled with apple baked goods and fall flavours and it was so much fun baking cute little tea muffins stuffed with juicy apples.  I’m sad that I didn’t get any pumpkin baking in, but November is still young so I’m crossing my fingers that I can still get some pumpkin baking in alongside all the holiday goodie recipes dancing in my head.

I got this recipe from my November issue of Food & Wine magazine and I was ecstatic to find holiday cookie recipes in their article “How Baking Can Change the World”, which highlights the fusion of bake sales and charitable causes.  I have cookie cookbooks, yes, but it’s always exciting to find random cookie recipes in magazines since they don’t always have them.  I’m crazy about bake sales and I go crazy for cookie articles and recipes in food magazines because there’s so much inspiration to gain from them: ways to package them, pretty decorative paper packaging, and all the different types of cookies you can try your hand at baking!  Bake sales have always been special to me because along with craft and artisan sales, I really enjoy supporting independent businesses and homemade/handmade things. 

I’ve been thinking more and more about holiday cookie exchanges and I love the idea of cookie exchanges in general.  Swapping cookies is a heck of a lot easier than trading cake!  And sure, many of us are cupcake lovers, but not everyone has the fancy tools and supplies to make frostings and decorations.  Cookies can be simple in composition and taste amazing though, so it’s win-win.  Baking batches of cookies to trade with your friends?  FUN!  Coming home with a dozen different cookies to nosh on?  EVEN MORE FUN!  I’ve never actually done a holiday cookie exchange before but I really want to, so we’ll see if anything pans out over the next and a half during the holdiays! 

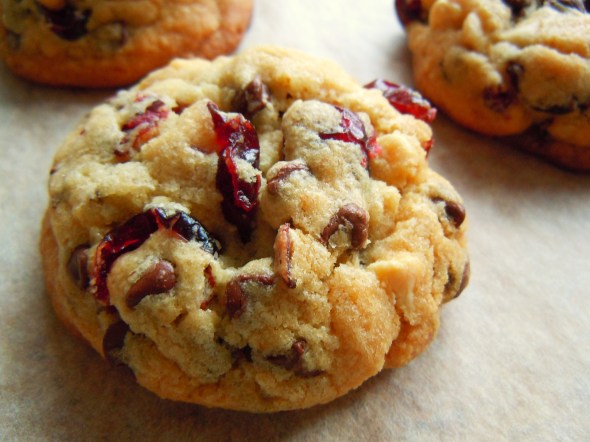
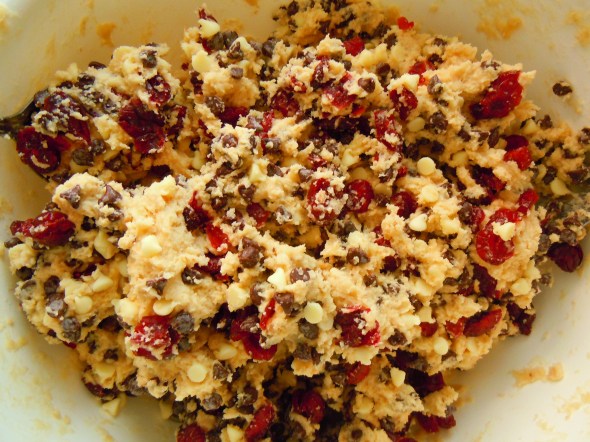
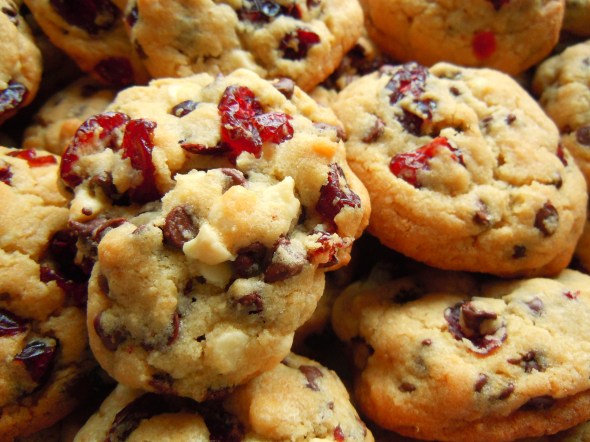
Given how the holidays are nipping at our heels, I felt that baking with tart cranberries would be the perfect way to straddle both the fall and upcoming winter seasons.  I love cranberries, both fresh ones and dried ones.  I know some people find cranberries way too fish-face sour, but I love cranberries and cranberry juice (and I do mean juice, not the oversweetened cocktail variety!) and I take advantage of cranberry juices and flavoured things whenever I can.  If you love chocolate chips and fruity flavours, you have to try this recipe!  These cookies are so super soft and chewy and you get such a such a beautiful flavour contrast between the cranberries and the chocolate.  The tartness of the cranberries and the rich sweetness of the chocolate don’t overpower each other so you get the best of both worlds.  They are delicious!

Recipe for Dried Cranberry and Chocolate Cookies from Food & Wine magazine (yields 3-4 dozen cookies)

Ingredients

  • 2 cups all-purpose flour
  • 1 cup quick-cooking or old-fashioned rolled oats
  • 1 teaspoon baking powder
  • 1 teaspoon baking soda
  • 1 teaspoon kosher salt
  • 2½ sticks unsalted butter (10 ounces), at room temperature
  • 1 cup light brown sugar
  • 1/2 cup granulated sugar
  • 1 large egg, at room temperature
  • 1 large egg yolk, at room temperature
  • 1 tablespoon pure vanilla extract
  • 1½ cups semisweet or white chocolate chips (*Deb’s Note: I used both!) 
  • 1½ cups dried cranberries

Directions

  • Preheat the oven to 325°F.  Line 2 baking sheets with parchment paper (*Deb’s Note: My batch of cookie dough made 39 cookies so I actually ended up reusing one of the two baking sheets to bake the extras after the first batch came out of the oven).
  • In a medium bowl, mix the flour with the oats, baking powder, baking soda, and salt (*Deb’s Note: I didn’t use the mixer for this step, I just used a large spoon to mix everything together).
  • In a standing mixer fitted with the paddle, beat the butter and both sugars at medium speed until creamy.  Add the egg followed by egg yolk and vanilla, beating well between additions and scraping down the side of the bowl as necessary (*Deb’s Note: I don’t have a standing mixer so I used a handheld).
  • Beat in the dry ingredients, then add the chocolate chips and cranberries and beat until incorporated (*Deb’s Note: I don’t prefer beating chocolate chips and dried fruit, so I used a large spoon to fold everything in instead).
  • Spoon heaping teaspoons of the dough onto the baking sheets, 2 inches apart.  Bake 12-15 minutes, until the cookies begin to brown at the edges.  Let the cookies cool on the baking sheets, then transfer them to a rack to cool completely (*Deb’s Note: I rolled my cookie dough into balls a little smaller than golf ball size and placed 15 on each baking sheet.  Mine took about 14 minutes in the oven).

*****

Recipe taken from Food & Wine magazine.  Sampson, Sally.  “How Baking Can Change the World.” Food & Wine November 2011: 130.

OMG, Marshmallows! Chocolatey, Ooey Gooey Rocky Road Cupcakes

8 Comments

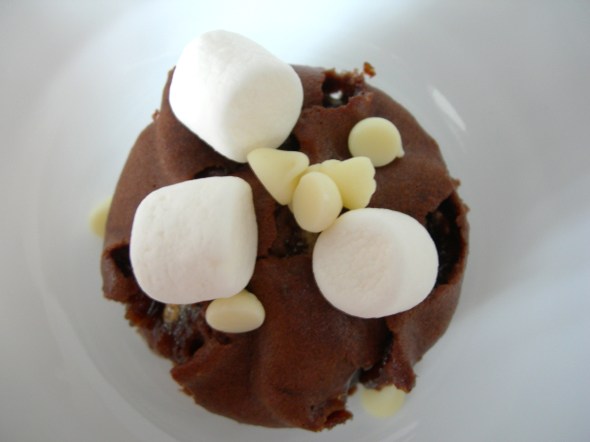
Who doesn’t get giddy over marshmallows, especially mini ones??  They’re adorable and really, marshmallows bring back a lot of childhood (and even adult!) memories for a lot of people, including myself.  Memories of watching them float in a mug of warm hot chocolate, roasting them over a fire and letting the toasty, ooey gooeyness melt in your mouth, using them to make Rice Krispy square treats, playing Chubby Bunny with them (oh man are there ever hilarious memories of this!  haha!), and just plain popping the white pillowy squishies in your mouth.  Those are reasons why marshmallows kick serious ass and why they continue to tug on our heartstrings and our tastebuds. 

And they’re irresistible in these chocolatey Rocky Road cupcakes.  The white chocolate and marshmallows make the chocolate cake super moist and melty, mmmm.  My apologies for the lack of frosting again; family is weird and does not like it.  That however did not stop me from topping mine with chocolate chip and marshmallow goodies.  Enjoy! 😀

Ingredients (Makes 12 cupcakes)

  • 1 stick (8 tablespoons) butter, at room temperature
  • 1/2 cup granulated sugar
  • 2 eggs
  • 1 cup self-rising flour
  • 3 tablespoons cocoa powder
  • 3 tablespoons milk (*I used 1% milk)
  • 1 oz. white chocolate chips (or 2 tablespoons)
  • 1 cup mini marshmallows
  • 2 tablespoons slivered almonds or brazil nuts (*I didn’t use them in mine, but it’s up to you!)

Frosting to Decorate

  • 3 ⅟₂oz. bittersweet chocolate, chopped (approx. 100 grams)
  • 1/2 cup heavy cream
  • 3 tablespoons slivered almonds or brazil nuts
  • 1/4 cup white chocolate chips
  • mini marshmallows

Directions

  1. Preheat the oven to 350°F, then line cupcake/muffin pan with 12 paper liners.
  2. Beat the butter and sugar together in a bowl until pale and fluffy, then beat in the eggs, one at a time.  Sift the flour and cocoa powder into the mixture and fold in.  Stir in the milk, followed by the white chocolate chips, marshmallows, and if using, nuts.
  3. Spoon the mixture into the cups and bake for about 18 minutes until risen and the tops spring back when lightly pressed.  Transfer to a wire rack to cool.
  4. For the frosting/topping: put the chocolate in a heatproof bowl.  Heat the cream in a saucepan until almost boiling, then pour over the chocolate and let stand for 5 minutes.  Stir until smooth and creamy, then let cool for about 30 minutes until thick and glossy.
  5. Spread the chocolate mixture over the cupcakes and sprinkles with nuts, chocolate chips, and marshmallows.

*****

Recipe from Cupcakes by Susannah Blake, 2007.  Photographs taken by me.