Tea Time Magazine & Delicious Cookie Recipes – Soft & Chewy Malted Chocolate Chunk Cookies!

Leave a comment

DSCN0492

It’s time for a brand new spankin’ cookie recipe on Ate by Ate and this one is TOTAL keeper!  Trust me when I say that once you make these cookies, you may never want to use another cookie base ever again.  They’re moist, they’re chewy, they’re chocolatey, they’re adorable, they’re super easy to make, and they are the perfect cookies for picnics, kid lunches, care packages and gifts, and tea parties!  I’ve made two other variations of these cookies since I made the original ones here and I’ve been daydreaming of endless other combinations to try out for my next batch.  These cookies are made extra awesome because of one very special ingredient: Maltesers!  YES, Maltesers, the awesome crunchy chocolate malt balls in the iconic red packaging that we all know and love.  I’ve loved Maltesers since I was a little girl and I remember them being one of my favourite treats growing up.  Not only did/do I love the crunchy, melt-in-your-mouth interior and chocolate creaminess but in a weird way they give me this throwback connection to my mum eating these same morsels when she was a little girl.

DSCN0464

DSCN0467

So, where did I get this fantabulous recipe?  From the May/June 2012 issue of Tea Time magazine!  Let it be known that I absolutely adore Tea Time magazine to itty bitty pieces and have been loving them for over a year now.  It’s strange how I never knew about or noticed Tea Time magazine until early last year.  As an avid magazine reader, you’d think that I’d at least be familiar with the publication having spent so much time in the magazine aisles all these years but nope, it wasn’t until last February that I stumbled on it at Shoppers Drug Mart.  And I’ve been smitten ever since buying every single issue thereafter and every single available back issue on the Hoffman Media website.

Tea Time magazine is all sorts of wonderful and a must-have and must-read for all tea lovers.  Amazing and informative tea articles, a plethora of teatime recipes, beautiful photos, and the most delicious stories and features on tea shops and afternoon tea venues from around the world.  It makes my heart flutter just talking about it.  My only wish?  That the magazine came out monthly!  It’s a bi-monthly publication so you can totally understand my impatient writhing while I wait for the next issue to come out (which, since we’re on the topic, comes out later this month for July and August!).  Here’s the recipe, everyone, enjoy it!

DSCN0481

Recipe for Malted Chocolate Chunk Cookies (yields approx. 3 dozen small cookies)

Ingredients

  • 1-1/4 cups all-purpose flour
  • 1/2 teaspoon baking soda
  • 1/2 teaspoon salt
  • 1/2 cup butter, at room temperature (1 stick)
  • 1/2 cup firmly packed brown sugar
  • 1/4 cup granulated sugar
  • 3/4 teaspoon vanilla extract
  • 1 large egg
  • 1/2 cup semisweet chocolate chips or chocolate chunk morsels
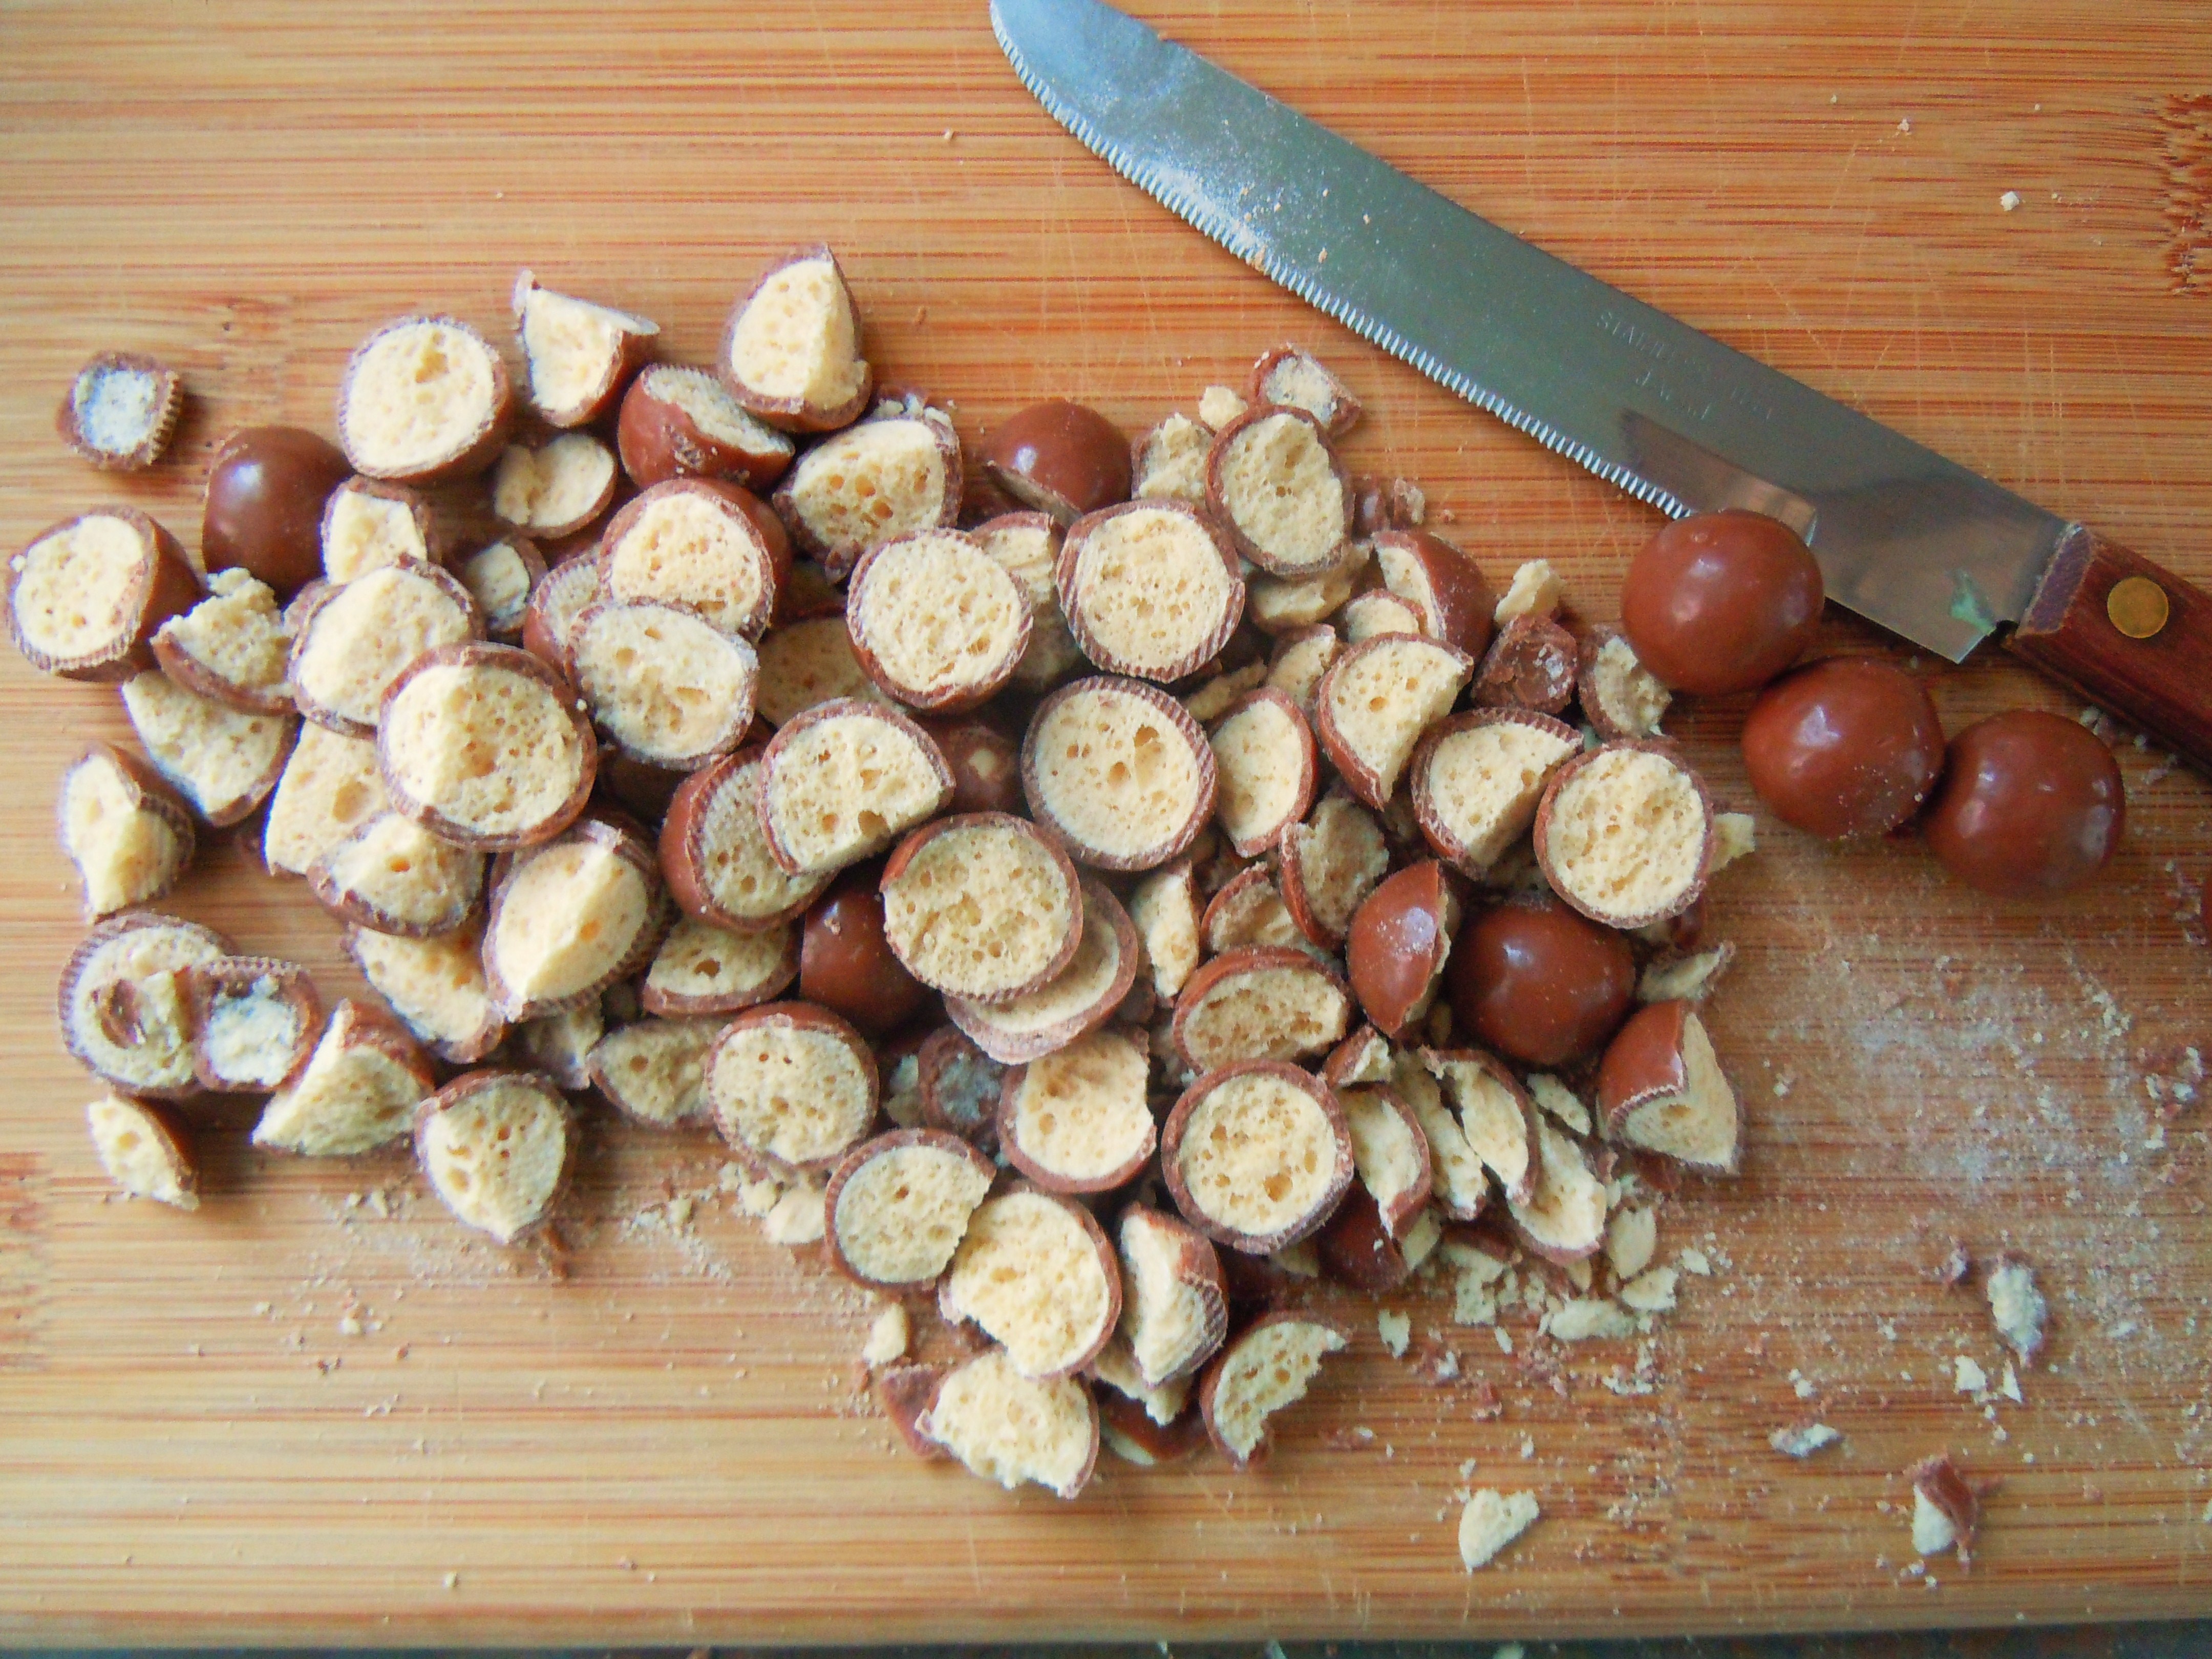
  • 1/2 cup coarsely chopped malted-milk ball

DSCN0471


DSCN0475

Directions

  • Heat oven to 375°F (*Deb’s Note: because my oven runs hot, I lowered mine to 350°F).
  • Line several baking sheets with parchment paper.  Set aside
  • In a medium bowl, combine flour, baking soda, and salt, whisking well.  Set aside.
  • In a large bowl, combine butter and sugars, stirring until creamy (*Deb’s Note: I used a handheld mixer to mix  the butter and sugars together; my arm muscles aren’t strong enough to just stir!).  Add vanilla and egg, stirring until incorporated (*Deb’s Note: again, I used my mixer)
  • Add flour mixture to butter mixture, stirring until well mixed (*Deb’s Note: I used my mixer to mix just until blended; do not over mix!)
  • Add chocolate chips/chunks and malted-milk balls, stirring well (*Deb’s Note: I actually just use my hands to incorporate everything)
  • Using a levered 1-teaspoon scoop, drop dough onto prepared baking sheets (*Deb’s Note: I don’t use a scoop for mine, I use my hands to grab chunks of dough, shaping them and patting them down just slightly so everything sticks together)
  • Bake until light golden brown, 6 to 7 minutes (*Deb’s Note: mine take 6 minutes).  Cool completely on wire racks.  Store in airtight containers.

DSCN0485

DSCN0487

DSCN0488

There’s No Such Thing As Too Many Cookies – Almond Kisses Cookie Bliss From Joanne Fluke’s Hannah Swensen Mystery Series

Leave a comment

DSCN9809

Almonds and chocolate and sprinkles, oh my!  I had myself a fun and relaxing cookie baking and decorating party recently (if you consider running back and forth from the oven to the kitchen table with 4 baking sheets of cookies relaxing!), testing out a recipe for Almond Kisses from Joanne Fluke’s Lemon Meringue Pie Murder from the Hannah Swensen foodie murder mystery series (if you don’t know about these books and how much I love this series, you need to jump on the bandwagon, PRONTO!).

I love baking out of these books so much and it had been awhile since the last time I tried out something new from one of them so I jumped on the opportunity one Saturday morning to make these amazing almond cookies.  The original recipe uses Hershey’s Kisses for the cookie middles but unfortunately, I didn’t have any of my favourite cookies ‘n cream ones or the yummy milk and white chocolate swirly ones so I settled on testing out the base almond cookie recipe first and jazzing up a batch with chocolate chips mixed in and another batch dipped in melted chocolate and sprinkled with sprinkles!

DSCN9831

DSCN9806

DSCN9804

I had the best time making these cookies and they turned out perfect!  And oh  my goodness they taste fantastically delicious.  Trust me when I say that they test the most delicious straight out of the oven.  I know you have to let them cool to dip them in chocolate if you want to follow my lead, but I really just mean within the first day or so.  They taste totally fine even a week after (providing you store them in a sealed container of course), but to really get the full food orgasmic effect, you need to taste them soon after they’re baked because they are just divine.  Like marzipan on cloud nine.  This is the type of recipe that can spawn 10 others simply because it’s so simple and versatile.  You can mix in chocolate chips (regular, white, butterscotch, whatever you like!), small sprinkles and shredded coconut, dip them in melted chocolate, or glaze them.  Or just leave them plain.

I was beaming with pride looking at all my cookies when I had the most bizarre and ridiculous exchange with my dad though.  Me: *wearing oven mitts, beaming* “Look how cute these cookies turned out!  They’re sooo good!”  Dad: “You didn’t make enough cookies.”  Me: “What do you mean I didn’t make enough cookies?!  I made 54!  Well, 52.  Dan and I just ate one each.”  Dad: “Yeah, but you’re giving away two dozen.”  Me: “Which leaves us with 28 still!”  Dad: “Exactly.  That’s not enough.”

I was so offended.  Hmph.  IT’S NOT MY FAULT THEY’RE SO YUMMY THEY DISAPPEAR LIKE CRAZY!

Anyway.

This is a must-try recipe, everyone, enjoy!

DSCN9825

DSCN9818

Recipe for Almond Kisses (yields approx. 4 dozen small cookies)

Ingredients (*Deb’s Note: the recipe below was actually cut in half.  The original recipe uses double the amounts)

  • 3/4 cup butter (1-1/2 sticks)
  • 1/2 cup granulated sugar
  • 1/2 cup brown sugar (*Deb’s Note: if you prefer to follow the original recipe’s ingredient list, substitute the brown sugar with 1 tablespoon molasses and increase the granulated sugar to 1 cup.  If you wish to follow the original recipe in its entirety, double the ingredients.)
  • 1/2 teaspoon vanilla
  • 1/2 teaspoon almond extract
  • 3/4 teaspoons baking soda
  • 1/2 teaspoon baking powder
  • 1/2 teaspoon salt
  • 3/4 cup ground almonds
  • 1 egg, beaten
  • 2 cups flour
  • your choice of add-in should you wish to use it!

DSCN9801

Directions

  • Heat oven to 350°F (*Deb’s Note: because my oven runs hot, I lowered mine to 325°F).  
  • Melt butter in microwave in mixing bowl.  Add sugars, vanilla extract and almond extract (Deb’s Note: if you are not using brown sugar and instead using molasses (see note in ingredient list), add the molasses after the adding the almond extract); mix with electric mixer until blended.  Add baking soda, baking powder and salt; mix well.  Add ground almonds; mix well.
  • Pour in beaten egg; mix until blended.  Add flour, 1 cup at a time; mix until just blended after each addition.  (Do not over mix).  (*Deb’s Note: If you are using add-ins like chocolate chips, add them after adding and mixing in the flour.  Mix them in gently with your hands so you’re not overworking the dough.)
  • Chill cookie dough in refrigerator for 1 hour.
  • Roll dough into small, walnut-sized balls.  Place on parchment-lined baking sheets, 15 dough balls to a sheet.  Flatten dough balls slightly using the palm of your hand.  Use the tines on a fork to make an indentation if you wish to jazz up the tops.
  • Bake 8 to 10 minutes (Deb’s Note: I baked mine for 8 minutes).  Cool on baking sheets for several minutes before removing to wire rack to cool completely.

Proceed to stuff your face with delicious fresh baked cookies.  Go the extra step and decorate using melted chocolate and sprinkles – like me!  Rinse and repeat.

DSCN9832

DSCN9829

*****

Recipe adapted from Joanne Fluke’s Lemon Meringue Pie Murder.  New York: Kensington Publishing Corporation, 2003.  Photographs taken by me.  The recipe can be found on page 55.

Mini Marshmallow Mania! Ringing in the New Year with Cookie Bar Baking – Marshmallow-Rainbow Chip Cookie Bars!

2 Comments

DSCN9543

Happy new year, everyone!  Despite the awful weather we had over the holidays here I hope everyone was still able to celebrate and have a happy holiday in some way, shape or form with family and friends.  Even though it was beyond frustrating to have an event of this magnitude happen just before Christmas (the scrambling, the worrying, the damage, everything.  I have never seen so much ice, so much white and so many streets blocked with yellow tape in my life) I know it could have been much worse.  My house didn’t lose power during the ice storm (a few outages here and there for a minute or so at a time but nothing serious) so I am beyond grateful and thankful that I was able to stay in my home during the aftermath.

Amidst all the craziness I managed to squeak in a little bit of baking, photographing and food blogging (not as much as I had initially planned but there was no way around it, not with entire neighbourhoods, streets and streetcars without power!) so I’ll be sharing the goods with you all over the next little while.  It may be back to the grind for many folks tomorrow but that doesn’t mean we can’t still have some holiday fun here!

DSCN9526

DSCN9539

2013 was full of so many highs and not-so-highs and while the latter part of the year didn’t exactly end the way I wanted or expected it to (in more ways than one), I do have some really awesome memories to look back on: taking my very first plane ride ever to Florida in February (and eating macarons from the Miromar Outlets in Fort Myers!), being a Macaron Day ambassador in March, attending and being a part of FBC’s first food blogging conference at Hockley Valley in April, taking the train for the first time to Ottawa in May, meeting Chef Michael Smith in June (I had the honour of eating hand-shucked oysters from him!), doing Summerlicious in July, celebrating my birthday in August, having one of the most amazing afternoon teas with my best friend in September (blog post in the works!), meeting Rosie Daykin at a food blogging event promoting her new Butter Baked Goods cookbook at Random House in October, buying teacups at my favourite antique market in November, and of course, celebrating Christmas in December with my best friend, my boyfriend and other friends in true foodie fashion.

DSCN9544

Sometimes I let the negative energy get to me (struggling to balance full-time work and blogging and everything/one else in my life and the not-so-highs that happened this year that I won’t care to repeat or hash out here) so much so that at times it feels crippling, emotionally and mentally.  I know I’m surrounded by so many good, wonderful and happy things though so I try my best to focus on them and I’m determined to make just as many, if not more, happy memories in 2014.

DSCN9547

DSCN9540

Baking is therapeutic for me so I had a little fun experimenting over the holidays and this is what came out of it!  I wanted to play around with the Chocolate Chip-Pecan Cookie Bar recipe from my Food & Wine magazine again using some of the baking goodies I had in my cupboard.  I really wanted to make it look festive so I swapped out the plain chocolate chips for rainbow chips in red, white and green, added a layer of miniature marshmallows and a layer of graham crumbs.

So what I did was crush some Honey Maid graham crackers and mix it with some melted butter.  I pressed the crumb mixture into an even layer in a parchment-lined 13×9-inch pan.  I topped it with an even layer of miniature marshmallows and then topped it with the cookie bar batter.  Voila!  A golden, ooey gooey cookie bar dessert!  I honestly just wanted to play around with the miniature marshmallows to see how it would turn out.  They completely melted into a gooey caramelized layer making them super fun to eat.  Keep in mind that this was just a fun experiment on my part, if we want to actually see a distinct layer of white marshmallows, we’ll have to tinker with the recipe.  Try them out and see how you like them!

DSCN9537

Recipe for Holiday Marshmallow-Rainbow Chip Cookie Bars (adapted from Chocolate-Chip-Pecan Cookie Bars recipe from March 2011 issue of Food & Wine magazine).  

Makes 12 big squares or 24 smaller rectangular bars.

Ingredients

  • 2/3 cup unsalted butter, softened, divided (1-1/4 sticks or 10 tablespoons)
  • 2 cups graham crumbs (if you are crushing graham crackers from scratch, it’ll take about 28 crackers)
  • 2 cups miniature marshmallows
  • 2 tablespoons vegetable oil
  • 1/4 cup plus 2 tablespoons granulated sugar
  • 1/4 cup plus 2 tablespoons light brown sugar
  • 1 large egg
  • 1 teaspoon pure vanilla extract
  • 1-1/2 cups all-purpose flour (*Deb’s Note: the original recipe called for whole wheat pastry flour but I didn’t have any and also didn’t feel like buying any so I just used regular all-purpose flour!)
  • 1/2 teaspoon baking soda
  • 1/2 teaspoon salt
  • 1 cup rainbow chocolate chips (*Deb’s Note: I used a holiday mix of red, white and green.  The original recipe called for semisweet chocolate chips)

Directions

  • Heat oven to 350°F.  Line the bottom of a 13×9-inch baking pan with parchment paper.
  • Reserve 1/4 cup butter (1/2 stick or 4 tablespoons) for later use; melt remaining butter.  Mix graham crumbs with melted butter.  Press graham crumb mixture evenly onto bottom of prepared pan.  Top with miniature marshmallows.
  • Beat the reserved butter and oil with the granulated sugar and brown sugar with an electric mixer until creamy.  Beat in the egg and vanilla until smooth.  In a small bowl, whisk the flour with the baking soda and salt; beat the dry ingredients into the wet mixture at low speed.  Gently fold in the rainbow chips until combined (*Deb’s Note: I just mixed the chips in with my hands so the dough wouldn’t be overmixed)
  • Transfer the dough to the prepared baking pan and press into an even layer over the marshmallows.  Bake 16-18 min. or until lightly browned and toothpick inserted in centre comes out clean.  Cool in pan 10 min.  Using parchment paper “handles”, lift out and cut into squares or bars.

The 2nd Time’s the Charm – Chocolate Snickerdoodle Cookies & Holiday Cookie Baking Fun

1 Comment

DSCN9716

I have eaten an absurd amount of cookies this past week.  One of my vendors gave me a gorgeous jar stuffed with 6 different kinds of homemade cookies (chocolate crackles, shortbread, cranberry biscotti, Italian walnut cookies, iced snowflake sugar cookies and adorable chocolate chip minis) last Wednesday, one of my coworkers happily fed me a smiling gingerbread man shortbread sandwich cookie filled with cream cheese candy cane frosting for dessert during lunch today, and I have eaten at least half a dozen of my own cookies between Sunday afternoon and today.  I’m surprised I haven’t turned INTO a cookie!

The smell of cookies is just intoxicating though and truly one of the happiest, yummiest things to have in your home.  Cookies have always given me a run for my money since I started to seriously bake in 2011 (as you will soon read below), working out only half the time and either burning or tasting blah the other half.  But I love cookies to pieces (eating, baking, photographing and scrapbooking about them) and there’s nothing like the sound of cracking eggs and a whirring mixer, the smell of chocolate, the feeling of cookie dough delicious enough to eat all on its own between your hands and the feeling of mastering a cookie recipe and being rewarded with fresh cookies that are perfect and tasty to boot!

DSCN9710

DSCN9724

We are knee-deep into the holiday baking blitz and this is the first of hopefully a handful of new recipes that I’ll be posting in the next little while.  What I have for all of you today: CHOCOLATE SNICKERDOODLES!  A classic cookie (snickerdoodle = cinnamon sugar cookie) made that more more awesome with the addition of chocolate!  While the recipe isn’t exactly brand new (it’s from Food & Wine’s November 2011 issue), it’s a recipe that definitely deserves to be kept in the holiday cookie recipe vault.  It’s gorgeous, it’s delicious and best of all, it uses the most basic of ingredients.  No need to schlep out into the snow to pick up some hard-to-find, expensive ingredient that you’ll only end up using once.  I was so grateful for this when the cookies didn’t work out for me the first time 2 weekends ago.

DSCN9719

I don’t know what it is about my oven.  I can bake cake.  I can bake quick breads.  I can bake muffins and bars and squares without so much as a lick of trouble.  But cookies?  It’s like my oven has a freakin’ mind of its own.  Half the time my cookies work and half the time they don’t and I’m constantly having to course correct as I go.  Which in and of itself is fine!  Baking and cooking are learning experiences and you won’t become a better baker or cook unless you flub up and learn from your mistakes.

But!  It’s so frustrating for me when it doesn’t work because I don’t get to bake all the time.  The whole point is for me to take photos and share recipes that I’ve tried with you all and to post about them, which completely eliminates workdays and weeknights and weekend nights (too dark to take photos).  Add to that the days when I’m out and about gathering content for Ate by Ate and not actually at home.  So my window of time is limited and when a recipe doesn’t work, I have to wait a whole week just to be able to try it out again.  Which I did for this one because I refused to admit defeat and I refused to believe that the recipe was bad.

DSCN9699

DSCN9701

What happened the first time was that the bottoms of the cookies burned.  To a crisp.  Black as hockey pucks burnt.  My mom had to frantically shut the oven off earlier than the stated bake time so smoke wouldn’t start billowing out for real.  And I stood there looking at them completely befuddled because I had followed the recipe to a tee.  My heart sunk.  I had promised my dad and brother chocolate cookies and now I had to tell them that they had burned and that they’d have to wait a week before I could try again.  We sadly chucked them all in the green bin garbage and while I sat at the dinner table fuming, I thought about how I was going to change the recipe to make it work: lower the temperature, decrease bake time, and double pan my baking sheet.

The result one week later?  PERFECT Chocolate Snickerdoodle Cookies!  Score one for team Cookie Bitch.

DSCN9606

Recipe for Chocolate Snickerdoodles (taken from November 2011 issue of Food & Wine magazine)

Makes 36 small cookies or 24 medium cookies

Ingredients:

  • 1-3/4 cups all-purpose flour
  • 1 teaspoon baking soda
  • 1/2 teaspoon baking powder
  • pinch of salt
  • 1 stick unsalted butter (1/2 cup or 8 tablespoons), softened
  • 1-1/2 cups sugar, divided (*Deb’s Note: you really don’t need this much, 1-1/4 cups is enough)
  • 2 oz. unsweetened chocolate, melted, cooled (*Deb’s Note: I didn’t have unsweetened so I just used Baker’s Bittersweet)
  • 1 large egg
  • 1 teaspoon cinnamon

DSCN9592

DSCN9698

Directions:

  • Preheat the oven to 400°F (*Deb’s Note: to make this recipe work for me, I lowered it to 375°F the first time since I knew my oven ran hot.  When that still didn’t work, I lowered it to 350°F for the 2nd time)
  • In a bowl, sift the flour with the baking soda, baking powder and salt.
  • In another bowl, using a handheld electric mixer, beat the butter with 1 cup of the sugar until creamy (*Deb’s Note: seriously, beat the heck out of it.  Don’t stop beating until it’s literally almost white).  Add the melted chocolate and the egg and beat until smooth.  (*Deb’s Note: because it’s winter and it’s cold, I found it was better to melt the chocolate after creaming the butter and sugar and just stirring until slightly cooled.  I melted it before creaming the butter and sugar the first time and by the time I was ready to use it, it had hardened again).  Beat in the dry ingredients until incorporated.
  • In a shallow bowl, mix the remaining sugar with the cinnamon.  Roll the dough into 1-inch balls and roll in the cinnamon sugar.  Transfer to parchment-lined baking sheets and flatten to 2-inch rounds (*Deb’s Note: I did this the first time and didn’t like the way they turned out so what I did the 2nd time was roll them into balls, place them on the baking sheet, flatten them with my palm, THEN dip one side in the cinnamon sugar, placing them back on the baking sheets with the sugar side facing up.  I found that rolling them and then flattening them removed some of the sugar as it stuck to my palm and just made a mess out of the baking sheets)
  • Bake for 12 to 14 minutes, until the cookies are puffed and cracked (*Deb’s Note: I decreased the bake time for mine by a lot.  Mine were perfect and done in 8 minutes).  Transfer to racks and let cool.

When Life Gives You Bananas…Make Chocolate Chunk-Banana Bread!

Leave a comment

DSCN9371

Let it be known that yours truly, Little Miss “I Love to Bake Lalalala”, has never made banana bread before.  EVER.  It’s crazy because it’s one of the easiest things to make!  Easy clean-up, one pan, and one spot to pour the batter in.  And let’s face it, mashing bananas is really fun!  It’s a great stress reliever and the stuff smells lovely.  There really isn’t a reason for my not making loaf cake or bread.  My family actually loves loaf cake!  It’s one of my brother and dad’s favourite snacks and they’ll eat the stuff for breakfast, afternoon snack, and midnight munchie.  Come to think of it, they actually enjoy quick breads and loaf cakes a lot more than cupcakes and probably even cookies (it pains me that nobody in my family loves frosting the way I do, sigh) but I just haven’t gotten around to making any until now.

So what do you do when life gives you too many bananas to eat on their own or to eat with your yogurt?  Make banana bread!  I suppose I could have made the yummy Banana Chocolate Chip cookies from my beloved Hannah Swensen mysteries, but I really wanted to give the loaf pan some hugs so banana bread it was.  And given how I work at Kraft, how folks rave about the banana bread recipes, and also how I have a ridiculous stash of Baker’s chocolate on my baking cupboard, I opted for the Chocolate-Chunk Banana Bread from the growing collection of banana bread recipes on the site at kraftcanada.com.  I LOVE the golden crust that formed on the outside and the chocolate chips were all warm and melty on the inside!

DSCN9359

DSCN9363

Recipe for Chocolate Chunk-Banana Bread on kraftcanada.com (serves 15)

Ingredients

  • 2 cups flour
  • 1 cup sugar
  • 2 tsp. Magic Baking Powder
  • 1/4 tsp. salt
  • 2 eggs
  • 1 cup mashed fully ripe bananas (about 3 bananas)
  • 1/3 cup oil
  • 1/4 cup milk
  • 4 oz. Baker’s Semi-Sweet Chocolate, coarsely chopped *Deb’s Note: I didn’t feel like chopping chocolate so I used 1 cup of chocolate chips instead*
  • 1/2 cup chopped walnuts

DSCN9364

Directions

  • Heat oven to 350°F.
  • Mix flour, sugar, baking powder and salt in large bowl; set aside.  Beat eggs, bananas, oil and milk in large bowl with whisk until well blended.  Add dry ingredients; stir just until moistened. Stir in chocolate and nuts.
  • Pour into greased 9×5-inch loaf pan. *Deb’s Note: I used parchment paper, I just prefer it*
  • Bake 55 min. or until toothpick inserted in centre comes out clean *Deb’s Note: I took mine out after 50 min.*  Cool in pan 10 min.; remove to wire rack.  Cool completely.

DSCN9366DSCN9374

DSCN9375

DSCN9372

*****

For more banana bread recipes on kraftcanada.com, click HERE!

Go Banana! Warm Banana-Almond Muffins with Brown Sugar Topping & The Story of a Broken-Hearted Muffin Lady

Leave a comment

banana almond muffins with brown sugar topping

Oh, muffin.  So many people adore you, my brother and father included.  They eat you for breakfast with their coffee.  They grab you on the go when they’re hungry or in a rush.  My dear coworker, Pat, treats everyone at work to a batch of you almost every Friday.  And let’s face it, you’re very versatile and easy to bake.  But I have to say it: I’m Deb and I have a love-hate relationship with you, THE MUFFIN.  *GASP*  Dun-dun-dun!

I know, you’d never know it from following Ate by Ate.  While I certainly don’t yak about muffins the way I do cupcakes or macarons, I do squeal over the cutie-patootieness of mini muffins (I even love saying mini muffin!) and I’ve posted a handful of tea muffin recipes over the years in a variety of flavours.  So what’s the deal?  I love homemade muffins but turn my nose up at store-bought ones.  There.  I said it.  I’m a muffin snob.

banana almond muffins with brown sugar topping

Which I know sounds confusing because every muffin was technically baked by somebody even if the batter was mixed by machinery.  But let’s be real.  I know we’ve all come across those horrendous muffins that look as though they’ve been pumped with steroids, that ooze grease when you give them a poke, that taste like cardboard (um, not that I know what cardboard really tastes like, but humour me and imagine it), and have no love, no character to them.  Those are the muffins that have turned me away all these years and to this day they still make me wary.

So much so that I even unintentionally declared it in public.  Oh yes.  I will never forget the day I broke a woman’s heart over a pack of muffins.  Long story short, I was grocery shopping with mumsie.  As we were browsing the bakery and baked goods, mumsie asked, “do you want some muffins?” to which I replied very forcefully and loudly, “EW, NO!  MUFFINS ARE FATTENING!”  Mumsie’s eyes and mouth widened in mortification as she smacked my arm and cried, “DEBRA!”  I scoffed, “what?”  “That woman was so happy looking at those muffins and you ruined it for her!”

Apparently I had destroyed a nearby shopper’s outlook on muffins with my unintentional outburst as said shopper immediately dropped the pack of muffins she was holding like a hot potato and scadaddled out of there.

Oops.

banana almond muffins with brown sugar topping

banana almond muffins with brown sugar topping

To that nice, innocent woman who was looking at muffins that day: I am sorry.  To make it up to you, here is a fab recipe I adapted from allrecipes.com.  They are banana-almond muffins with brown sugar-cinnamon-almond topping and they are moist and delicious and I hope they make you happy.  With homemade muffin love, Deb.

Recipe for Banana-Almond Muffins with Brown Sugar-Cinnamon-Almond Topping (adapted from the Banana Crumb Muffins recipe from allrecipes.com)

Makes 12 muffins

Ingredients: Muffins

  • 1-1/2 cups all-purpose flour
  • 1/2 cup ground almonds (*Deb’s Note: this was my special addition!  The original recipe does not call for ground almonds)
  • 1 tsp. baking soda
  • 1 tsp. baking powder
  • 1/2 tsp. salt
  • 1/2 tsp. cinnamon
  • 1/2 tsp. nutmeg
  • 4 bananas, mashed (*Deb’s Note: the original recipe called for 3 bananas; I had 4 in my kitchen so I just used up all 4)
  • 3/4 cup granulated sugar
  • 1 egg, beaten
  • 1/3 cup vegetable oil (*Deb’s Note: the original recipe called for butter but I didn’t feel it was necessary to use butter so I substituted vegetable oil and it worked out perfectly)

Ingredients: Topping

  • 1/4 cup sliced almonds
  • 2 Tbsp. brown sugar
  • 2 tsp. cinnamon

banana almond muffins with brown sugar topping

Directions

  • Preheat oven to 375°F.  Lightly grease 12 muffin cups or line with paper liners.
  • In a large bowl, mix together flour, ground almonds, baking soda, baking powder, salt, cinnamon and nutmeg.  In another bowl, beat together bananas, sugar, egg and vegetable oil.  Stir the banana mixture into the flour mixture just until moistened.  Spoon batter into prepared muffin cups.
  • In a small bowl, mix together sliced almonds, brown sugar and cinnamon for the topping.  Sprinkle topping over muffins.
  • Bake for 18 to 20 min. (*Deb’s Note: the original recipe called for 18 to 20 min.; I baked mine for 17 min. and they turned out fine), or until toothpick inserted into centre of muffin comes out clean.

*****

Recipe adapted from allrecipes.com.  The original recipe, Banana Crumb Muffins, can be accessed HERE.

Happy First Day of Fall! Whipping Up a Batch of Butterscotch Pecan Cookie Bars

2 Comments

Happy first day of fall, everyone!  Well, for those of you who enjoy four seasons that is.  The tree leaves have been changing to reds and oranges, it’s chillier, I’ve started shopping for new sweaters (my selection of cardigans is rather sad), and my craving for fall comfort food is just getting started.  So, how did I celebrate the first day of fall, my favourite season?  By sleeping in (I can’t even remember the last time I slept in until 10:45) and then hauling out my baking bags of goodies and electric mixer for some good old fashioned fall baking!  I’m already thinking well ahead into the holiday season but before I got too ahead of myself, I thought it would be nice to bake another batch of cookie bars and what better way to ring in the new season with a batch of yummy butterscotch pecan cookie bars? 

I’ve been so inspired by fall food that I’ve been doing a ton of research on restaurant items around the city including searches for apple menu items (both sweet and savoury), pumpkin, butternut squash, and pecan.  I think I’m covered on the pumpkin and butternut squash for the time being, but I’m still searching high and low for some standout pecan dishes.  Pecan pie is wonderful and I can’t wait to sink my teeth into some, but aside from that, all I’m really finding is salads with candied pecans and while that’s nice, it’s hardly what I’d consider out of the ordinary, you know?  I’m going to keep digging around, but in the meantime, here’s some fab butterscotch pecan cookie bars to celebrate our first taste of fall!

Recipe for Butterscotch Pecan Cookie Bars (adapted from Chocolate-Chip-Pecan Cookie Bars recipe from March 2011 issue of Food & Wine magazine).  

Makes 12 big squares or 24 smaller rectangular bars.

Ingredients

  • 1 cup pecans
  • 4 tablespoons unsalted butter, softened (1/2 a stick)
  • 2 tablespoons canola oil 
  • 1/4 cup plus 2 tablespoons granulated sugar
  • 1/4 cup plus 2 tablespoons light brown sugar
  • 1 large egg
  • 1 teaspoon pure vanilla extract
  • 1-1/2 cups all-purpose flour (*Deb’s Note: the original recipe called for whole wheat pastry flour but I didn’t have any and also didn’t feel like buying any so I just used regular all-purpose flour!)
  • 1/2 teaspoon baking soda
  • 1/2 teaspoon salt
  • 1 cup butterscotch chips (*Deb’s Note: the original recipe called for semisweet chocolate chips)

Directions

  • Preheat the oven to 350°F and line the bottom of a 9-by-13-inch baking pan with parchment paper.  Spread the pecans in a pie plate and toast for about 8 minutes until golden.  Chop the pecans and let cool.  (*Deb’s Note: I didn’t toast my pecans and went straight to coarsely chopping them as they were.  It’s entirely up to you if you want them toasty or not!)
  • In the bowl of a standing electric mixer (*Deb’s Note: I used a hand-held electric mixer and a plain old mixing bowl), beat the butter and oil with the granulated sugar and brown sugar until creamy.  Beat in the egg and vanilla until smooth.  In a small bowl, whisk the flour with the baking soda and salt; beat the dry ingredients into the wet mixture at low speed.  Add the butterscotch chips (or chocolate chips if you’re following the original recipe) and pecans; beat just until incorporated (*Deb Note: I didn’t use my mixer for this step, I just mixed it all with my hands).
  • Transfer the dough to the prepared baking pan and press into an even layer.  Bake for about 20 minutes, until lightly browned and nearly set in the center (*Deb’s Note: I baked mine for 18 minutes).  Let cool completely.  Using parchment paper “handles”, lift out and cut into squares or bars.

I sprinkled mine with cinnamon just before I popped the baking pan into the oven because I felt like it, but you could also drizzle some melted white chocolate over top after they’ve finished baking and cooled to jazz things up.  These would so good with some vanilla ice cream too!  For next time though, I would adjust the bake time.  I know the original recipe called for a 20 minute bake time, but I never follow it to a tee because my oven runs hot so I normally knock 2 minutes off.  I would even do for around 16 minutes the next time, just so they can be a little gooeier on the insides and a little more chewy.  I loved using the butterscotch chips though because the squares tasted like a cross between rich caramel and butterscotch brittle.

*****

Recipe adpated from Food & Wine magazine.  “Dessert Redux: Chef Recipes Made Easy”.  Food & Wine March 2011: 86.